Centralize Threat Intellgience and Incident Management with OpenCTI
In the midst of ever-evolving cyber threats, effectively managing attacks targeting your organization, tracking vendor-related IOCs, and monitoring in-house IOCs can pose a significant challenge. This is where OpenCTI comes into play within your organization. OpenCTI serves as an application designed to store threat intelligence in a centralized location, facilitating further analysis. Leveraging the STIX2 format, OpenCTI ensures compatibility with multiple vendors and products. For more detailed content on OpenCTI beyond this blog, please refer to the official documentation available here.
Installing OpenCTI
Before installing OpenCTI, ensure your system is up to date and that Docker is installed.
1
2
sudo apt-get update && sudo apt-get upgrade -y
sudo apt install docker-compose -y
For proper functionality of the Elasticsearch component in OpenCTI, memory adjustments are necessary. Set and add vm.max_map_count=1048575 to /etc/sysctl.conf.
1
2
sudo sysctl -w vm.max_map_count=1048575
sudo nano /etc/sysctl.conf
Retrieve and execute the Docker Compose file from the official GitHub repository. Additionally, obtain the .env file and modify the default configurations within it. For insights into the purpose of specific variables, refer to the official documentation.
Below is the configuration utilized in this deployment. I substituted the versions in the Docker Compose file with environment variables for seamless updates between releases.
1
2
3
4
5
6
7
8
9
10
11
12
13
14
15
16
17
18
19
20
21
22
23
24
25
26
27
28
29
30
31
32
33
34
35
36
37
38
39
40
41
42
43
44
45
46
47
48
49
50
51
52
53
54
55
56
57
58
59
60
61
62
63
64
65
66
67
68
69
70
71
72
73
74
75
76
77
78
79
80
81
82
83
84
85
86
87
88
89
90
91
92
93
94
95
96
97
98
99
100
101
102
103
104
105
106
107
108
109
110
111
112
113
114
115
116
117
118
119
120
121
122
123
124
125
126
127
128
129
130
131
132
133
134
135
136
137
138
139
140
141
142
143
144
145
146
147
148
149
150
151
152
153
154
155
156
157
158
159
160
161
162
163
164
165
166
167
168
169
170
171
172
173
174
175
176
version: '3'
services:
  redis:
    image: redis:${REDIS_VERSION}
    restart: always
    volumes:
      - redisdata:/data
  elasticsearch:
    image: docker.elastic.co/elasticsearch/elasticsearch:${ELASTICSEARCH_VERSION}
    volumes:
      - esdata:/usr/share/elasticsearch/data
    environment:
      # Comment-out the line below for a cluster of multiple nodes
      - discovery.type=single-node
      # Uncomment the line below below for a cluster of multiple nodes
      # - cluster.name=docker-cluster
      - xpack.ml.enabled=false
      - xpack.security.enabled=false
      - "ES_JAVA_OPTS=-Xms${ELASTIC_MEMORY_SIZE} -Xmx${ELASTIC_MEMORY_SIZE}"
    restart: always
    ulimits:
      memlock:
        soft: -1
        hard: -1
      nofile:
        soft: 65536
        hard: 65536
  minio:
    image: minio/minio:${MINIO_VERSION}
    volumes:
      - s3data:/data
    ports:
      - "9000:9000"
    environment:
      MINIO_ROOT_USER: ${MINIO_ROOT_USER}
      MINIO_ROOT_PASSWORD: ${MINIO_ROOT_PASSWORD}
    command: server /data
    restart: always
  rabbitmq:
    image: rabbitmq:${RABBITMQ_VERSION}
    environment:
      - RABBITMQ_DEFAULT_USER=${RABBITMQ_DEFAULT_USER}
      - RABBITMQ_DEFAULT_PASS=${RABBITMQ_DEFAULT_PASS}
      - RABBITMQ_NODENAME=rabbit01@localhost
    volumes:
      - amqpdata:/var/lib/rabbitmq
    restart: always
  opencti:
    image: opencti/platform:${OPENCTI_VERSION}
    environment:
      - NODE_OPTIONS=--max-old-space-size=8096
      - APP__PORT=8080
      - APP__BASE_URL=${OPENCTI_BASE_URL}
      - APP__ADMIN__EMAIL=${OPENCTI_ADMIN_EMAIL}
      - APP__ADMIN__PASSWORD=${OPENCTI_ADMIN_PASSWORD}
      - APP__ADMIN__TOKEN=${OPENCTI_ADMIN_TOKEN}
      - APP__APP_LOGS__LOGS_LEVEL=error
      - REDIS__HOSTNAME=redis
      - REDIS__PORT=6379
      - ELASTICSEARCH__URL=http://elasticsearch:9200
      - MINIO__ENDPOINT=minio
      - MINIO__PORT=9000
      - MINIO__USE_SSL=false
      - MINIO__ACCESS_KEY=${MINIO_ROOT_USER}
      - MINIO__SECRET_KEY=${MINIO_ROOT_PASSWORD}
      - RABBITMQ__HOSTNAME=rabbitmq
      - RABBITMQ__PORT=5672
      - RABBITMQ__PORT_MANAGEMENT=15672
      - RABBITMQ__MANAGEMENT_SSL=false
      - RABBITMQ__USERNAME=${RABBITMQ_DEFAULT_USER}
      - RABBITMQ__PASSWORD=${RABBITMQ_DEFAULT_PASS}
      - SMTP__HOSTNAME=${SMTP_HOSTNAME}
      - SMTP__PORT=25
      - PROVIDERS__LOCAL__STRATEGY=LocalStrategy
    ports:
      - "8080:8080"
    depends_on:
      - redis
      - elasticsearch
      - minio
      - rabbitmq
    restart: always
  worker:
    image: opencti/worker:${OPENCTI_VERSION}
    environment:
      - OPENCTI_URL=http://opencti:8080
      - OPENCTI_TOKEN=${OPENCTI_ADMIN_TOKEN}
      - WORKER_LOG_LEVEL=info
    depends_on:
      - opencti
    deploy:
      mode: replicated
      replicas: 3
    restart: always
  connector-export-file-stix:
    image: opencti/connector-export-file-stix:${OPENCTI_VERSION}
    environment:
      - OPENCTI_URL=http://opencti:8080
      - OPENCTI_TOKEN=${OPENCTI_ADMIN_TOKEN}
      - CONNECTOR_ID=${CONNECTOR_EXPORT_FILE_STIX_ID} # Valid UUIDv4
      - CONNECTOR_TYPE=INTERNAL_EXPORT_FILE
      - CONNECTOR_NAME=ExportFileStix2
      - CONNECTOR_SCOPE=application/json
      - CONNECTOR_CONFIDENCE_LEVEL=15 # From 0 (Unknown) to 100 (Fully trusted)
      - CONNECTOR_LOG_LEVEL=info
    restart: always
    depends_on:
      - opencti
  connector-export-file-csv:
    image: opencti/connector-export-file-csv:${OPENCTI_VERSION}
    environment:
      - OPENCTI_URL=http://opencti:8080
      - OPENCTI_TOKEN=${OPENCTI_ADMIN_TOKEN}
      - CONNECTOR_ID=${CONNECTOR_EXPORT_FILE_CSV_ID} # Valid UUIDv4
      - CONNECTOR_TYPE=INTERNAL_EXPORT_FILE
      - CONNECTOR_NAME=ExportFileCsv
      - CONNECTOR_SCOPE=text/csv
      - CONNECTOR_CONFIDENCE_LEVEL=15 # From 0 (Unknown) to 100 (Fully trusted)
      - CONNECTOR_LOG_LEVEL=info
    restart: always
    depends_on:
      - opencti
  connector-export-file-txt:
    image: opencti/connector-export-file-txt:${OPENCTI_VERSION}
    environment:
      - OPENCTI_URL=http://opencti:8080
      - OPENCTI_TOKEN=${OPENCTI_ADMIN_TOKEN}
      - CONNECTOR_ID=${CONNECTOR_EXPORT_FILE_TXT_ID} # Valid UUIDv4
      - CONNECTOR_TYPE=INTERNAL_EXPORT_FILE
      - CONNECTOR_NAME=ExportFileTxt
      - CONNECTOR_SCOPE=text/plain
      - CONNECTOR_CONFIDENCE_LEVEL=15 # From 0 (Unknown) to 100 (Fully trusted)
      - CONNECTOR_LOG_LEVEL=info
    restart: always
    depends_on:
      - opencti
  connector-import-file-stix:
    image: opencti/connector-import-file-stix:${OPENCTI_VERSION}
    environment:
      - OPENCTI_URL=http://opencti:8080
      - OPENCTI_TOKEN=${OPENCTI_ADMIN_TOKEN}
      - CONNECTOR_ID=${CONNECTOR_IMPORT_FILE_STIX_ID} # Valid UUIDv4
      - CONNECTOR_TYPE=INTERNAL_IMPORT_FILE
      - CONNECTOR_NAME=ImportFileStix
      - CONNECTOR_VALIDATE_BEFORE_IMPORT=true # Validate any bundle before import
      - CONNECTOR_SCOPE=application/json,text/xml
      - CONNECTOR_AUTO=true # Enable/disable auto-import of file
      - CONNECTOR_CONFIDENCE_LEVEL=15 # From 0 (Unknown) to 100 (Fully trusted)
      - CONNECTOR_LOG_LEVEL=info
    restart: always
    depends_on:
      - opencti
  connector-import-document:
    image: opencti/connector-import-document:${OPENCTI_VERSION}
    environment:
      - OPENCTI_URL=http://opencti:8080
      - OPENCTI_TOKEN=${OPENCTI_ADMIN_TOKEN}
      - CONNECTOR_ID=${CONNECTOR_IMPORT_DOCUMENT_ID} # Valid UUIDv4
      - CONNECTOR_TYPE=INTERNAL_IMPORT_FILE
      - CONNECTOR_NAME=ImportDocument
      - CONNECTOR_VALIDATE_BEFORE_IMPORT=true # Validate any bundle before import
      - CONNECTOR_SCOPE=application/pdf,text/plain,text/html
      - CONNECTOR_AUTO=true # Enable/disable auto-import of file
      - CONNECTOR_ONLY_CONTEXTUAL=false # Only extract data related to an entity (a report, a threat actor, etc.)
      - CONNECTOR_CONFIDENCE_LEVEL=15 # From 0 (Unknown) to 100 (Fully trusted)
      - CONNECTOR_LOG_LEVEL=info
      - IMPORT_DOCUMENT_CREATE_INDICATOR=true
    restart: always
    depends_on:
      - opencti

volumes:
  esdata:
  s3data:
  redisdata:
  amqpdata:
Below is a my same .env file. Make sure to update any passwords and IDs used for connectors.
1
2
3
4
5
6
7
8
9
10
11
12
13
14
15
16
17
18
19
20
OPENCTI_VERSION=5.12.5
REDIS_VERSION=7.2.3
ELASTICSEARCH_VERSION=8.11.3
MINIO_VERSION=RELEASE.2023-11-15T20-43-25Z
RABBITMQ_VERSION=3.12-management
OPENCTI_ADMIN_EMAIL=admin@opencti.io
OPENCTI_ADMIN_PASSWORD=CHANGEMECHANGEMECHANGEME
OPENCTI_ADMIN_TOKEN=CHANGEMECHANGEME_UUIDv4
OPENCTI_BASE_URL=http://opencti:8080
MINIO_ROOT_USER=opencti
MINIO_ROOT_PASSWORD=CHANGEMECHANGEMECHANGEME
RABBITMQ_DEFAULT_USER=opencti
RABBITMQ_DEFAULT_PASS=CHANGEMECHANGEMECHANGEME
CONNECTOR_EXPORT_FILE_STIX_ID=dd817c8b-abae-460a-9ebc-97b1551e70e6
CONNECTOR_EXPORT_FILE_CSV_ID=7ba187fb-fde8-4063-92b5-c3da34060dd7
CONNECTOR_EXPORT_FILE_TXT_ID=ca715d9c-bd64-4351-91db-33a8d728a58b
CONNECTOR_IMPORT_FILE_STIX_ID=72327164-0b35-482b-b5d6-a5a3f76b845f
CONNECTOR_IMPORT_DOCUMENT_ID=c3970f8a-ce4b-4497-a381-20b7256f56f0
SMTP_HOSTNAME=localhost
ELASTIC_MEMORY_SIZE=4G
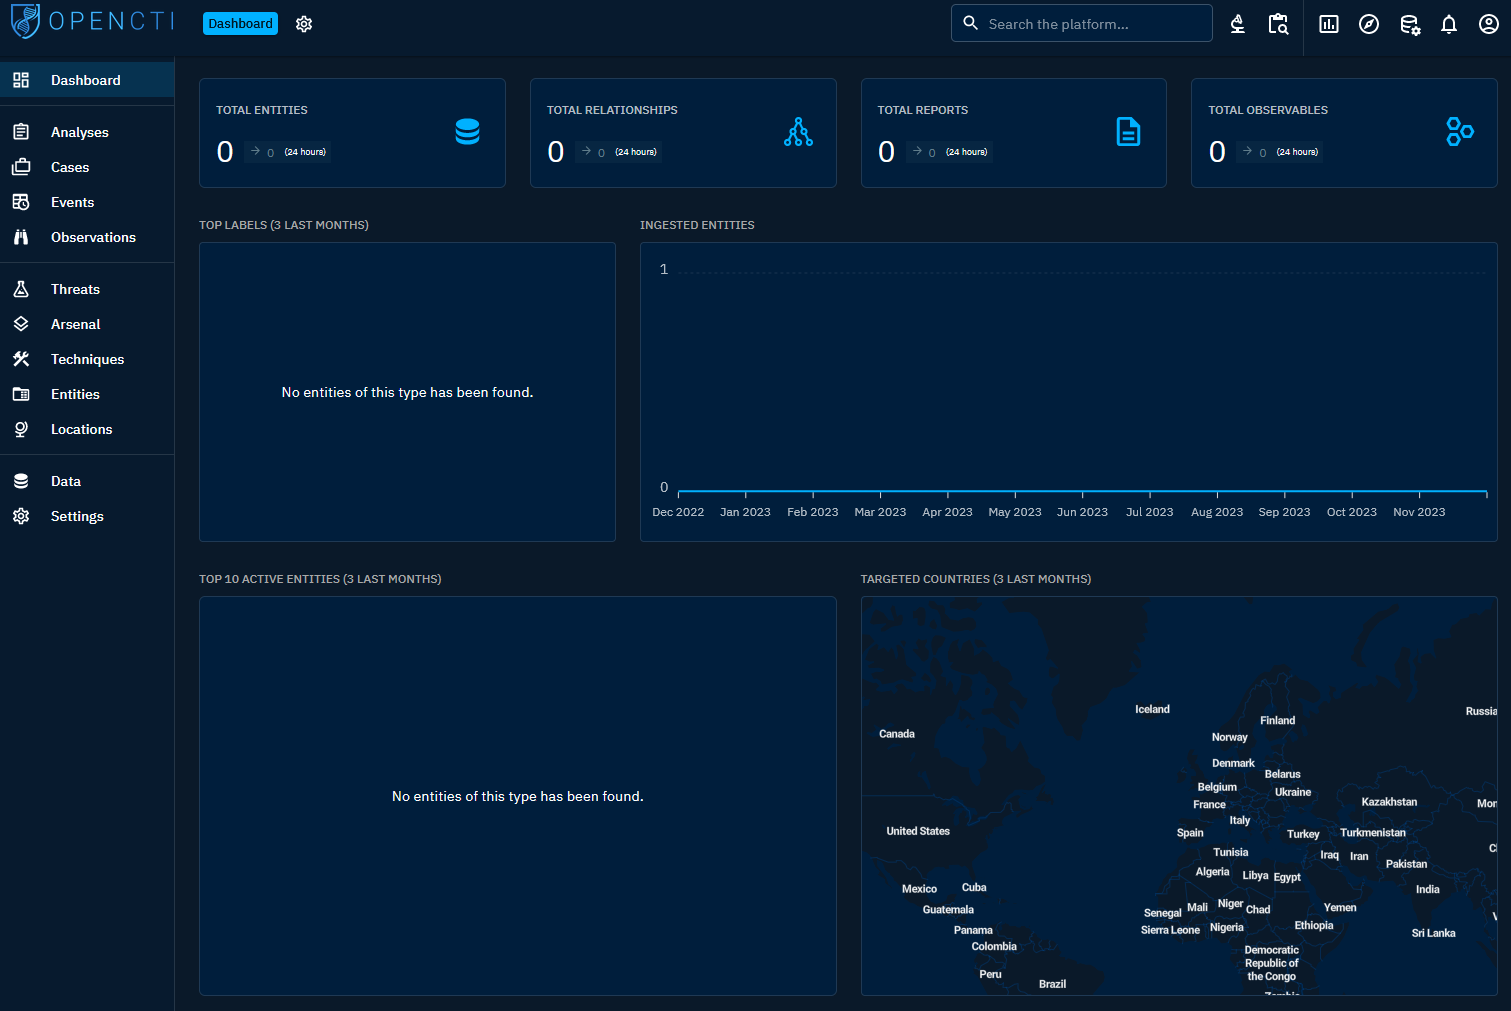
Overview
Upon deploying OpenCTI, you can log in using the default credentials you’ve set up in your environment file. Upon logging in, you’ll be directed to the main dashboard page. At this stage, there won’t be any data present as no connections to platforms have been established yet. OpenCTI includes various data connectors capable of importing data into the platform or exporting it to other platforms/files. The following section will cover this in detail.
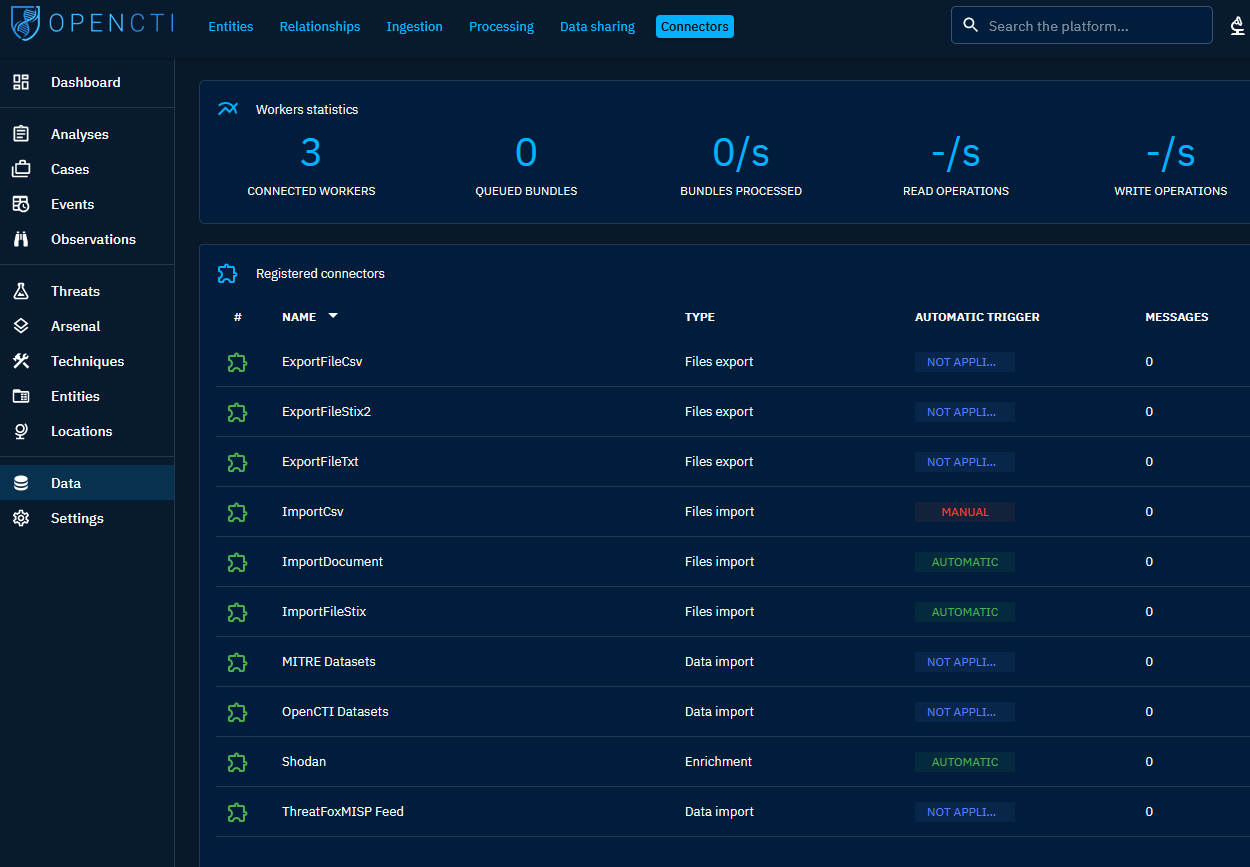
Connectors
Connectors within OpenCTI serve the purpose of importing or exporting data. Each connector operates as an individual Python application that interacts with the OpenCTI platform. To review the current status of connectors, navigate to Data > Connectors.
To initiate the Connectors, you’ll need to create an account dedicated to each connector. Follow these steps for each connector you set up. Subsequent sections will delve into various connectors to kick-start your process.
- Go to Settings > Security > Users
- Click the + icon to add an account and fill out the account info
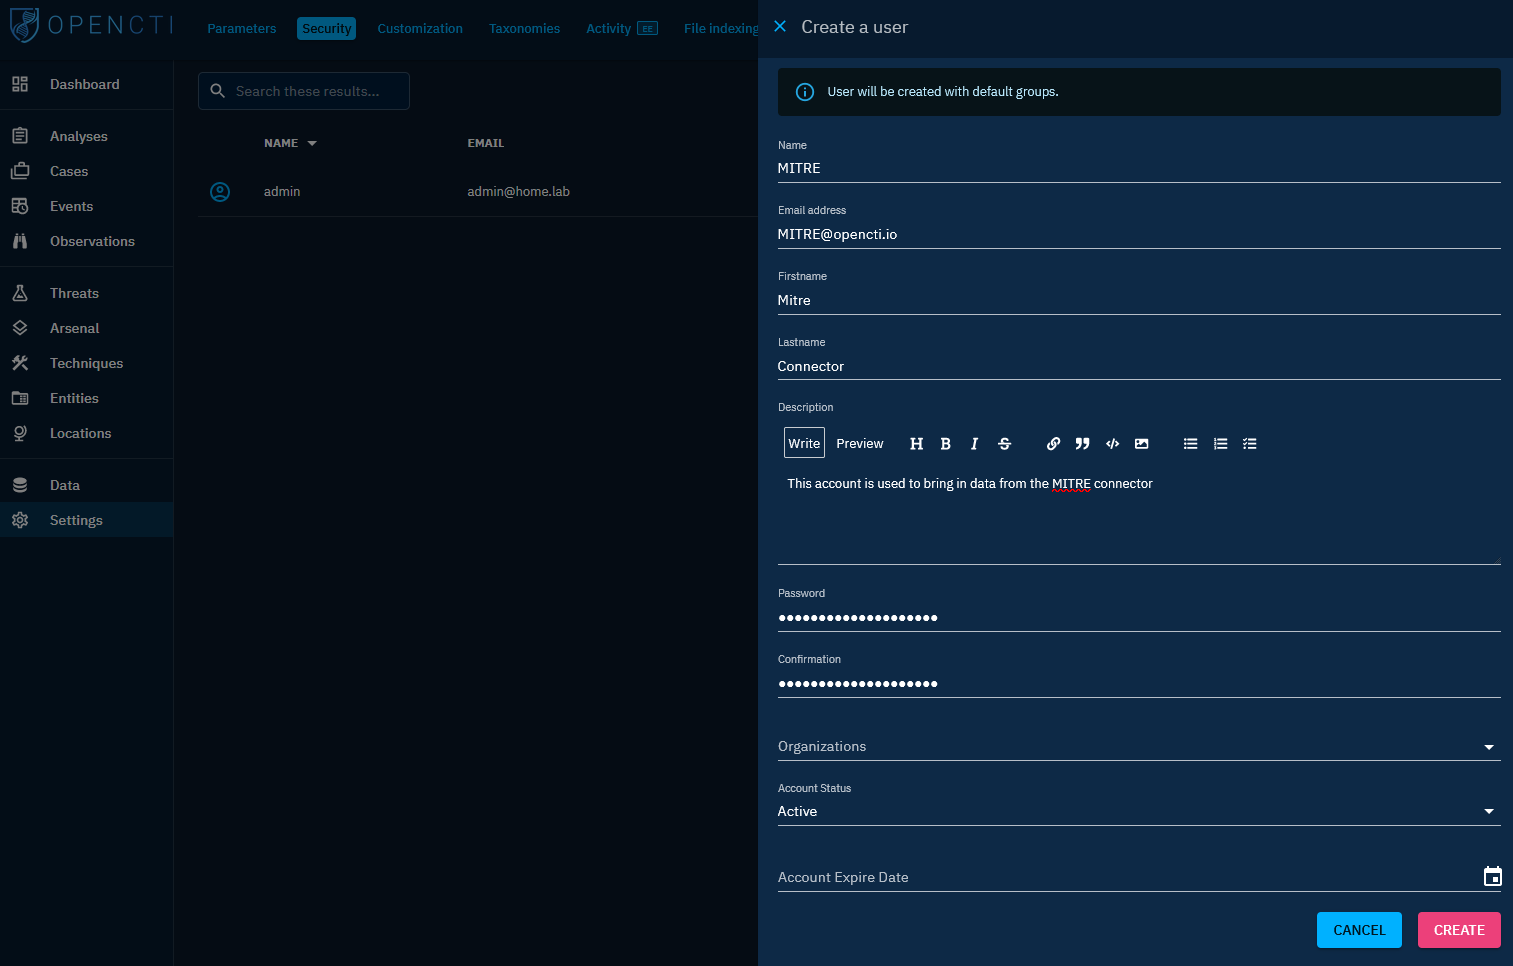
- Click on the newly created account and click the pencil icon to edit it.
- Go to the group tab and change the group from Default to Connectors. This will give the account the permission it needs to connect to the platform.

- Copy the Token value on the account page as that will be used in the configuration of the connector.
Internal Import Connectors
Data import connectors will bring in data from other platforms. Some useful data Import Connectors to get started with are MITRE Datasets Connector, OpenCTI Datasets Connector, CVE Connector, and MISP Connect.
OpenCTI Dataset
For setting up import connectors, access the GitHub repository associated with the desired connector and retrieve the Docker Compose file. Extract the necessary data from it. Each connector might require adjustments to specific variables, usually documented within the repository.
Below is an example utilizing the MITRE dataset connector. Ensure you include the appropriate account token associated with the dataset you’re creating. It’s crucial to assign unique Connector IDs for each connector. Repeat these steps for any other data connectors you wish to integrate into the platform.
1
2
3
4
5
6
7
8
9
10
11
12
13
14
15
16
17
  connector-mitre:
    image: opencti/connector-mitre:${OPENCTI_VERSION}
    environment:
      - OPENCTI_URL=http://opencti:8080
      - OPENCTI_TOKEN=ChangeMe
      - CONNECTOR_ID=ChangeMe
      - CONNECTOR_TYPE=EXTERNAL_IMPORT
      - "CONNECTOR_NAME=MITRE Datasets"
      - CONNECTOR_SCOPE=tool,report,malware,identity,campaign,intrusion-set,attack-pattern,course-of-action,x-mitre-data-source,x-mitre-data-component,x-mitre-matrix,x-mitre-tactic,x-mitre-collection
      - CONNECTOR_CONFIDENCE_LEVEL=75
      - CONNECTOR_UPDATE_EXISTING_DATA=true
      - CONNECTOR_RUN_AND_TERMINATE=false
      - CONNECTOR_LOG_LEVEL=error
      - MITRE_INTERVAL=7 # In days
    restart: always
    depends_on:
      - opencti
Internal Encrichment Connecotrs
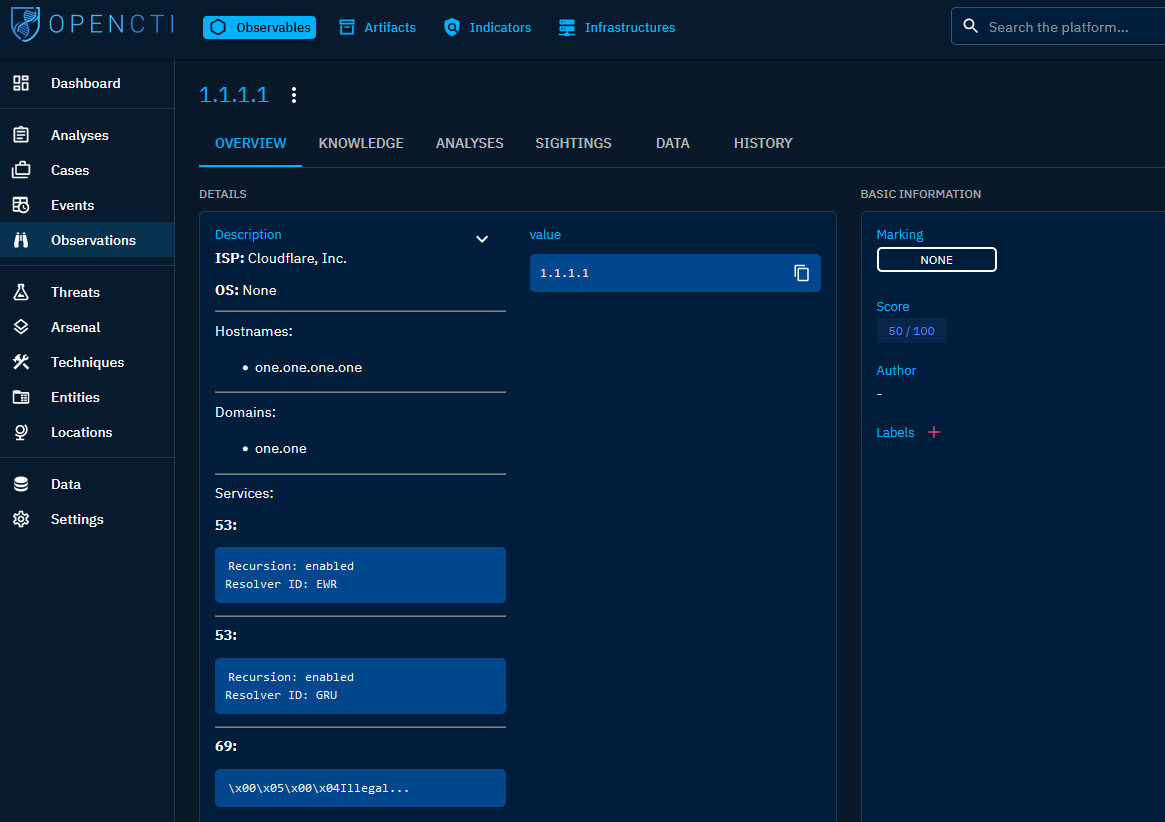
Internal Enrichment connectors serve a valuable purpose when your platform contains IOCs (Indicators of Compromise) but lacks sufficient context around them. These connectors enable OpenCTI to interact with services like VirusTotal, Shodan, and others to gather additional data, enriching the existing information.
Shodan
To install the Shodan connector, acquire the Docker Compose file from the GitHub repository and integrate it into your OpenCTI setup. Ensure you create a new user account specifically for this connector and have your Shodan API key readily available for configuration.
1
2
3
4
5
6
7
8
9
10
11
12
13
14
15
16
17
18
  connector-shodan:
    image: opencti/connector-shodan:${OPENCTI_VERSION}
    environment:
      - OPENCTI_URL=http://opencti:8080
      - OPENCTI_TOKEN=ChangeMe
      - CONNECTOR_ID=ChangeMe
      - CONNECTOR_TYPE=INTERNAL_ENRICHMENT
      - CONNECTOR_NAME=Shodan
      - CONNECTOR_SCOPE=IPv4-Addr
      - CONNECTOR_AUTO=true
      - CONNECTOR_CONFIDENCE_LEVEL=75 # From 0 (Unknown) to 100 (Fully trusted)
      - CONNECTOR_LOG_LEVEL=error
      - SHODAN_TOKEN=ChangeMe
      - SHODAN_MAX_TLP=TLP:AMBER
      - SHODAN_CREATE_INDICATORS=true
    restart: always
    depends_on:
      - opencti
Through this connector, any IPV4 address entered into the platform will undergo enrichment with relevant data sourced from Shodan, whenever applicable.
Stream Connecotrs
Stream connectors serve the purpose of transferring your OpenCTI data to external data sources, enabling enrichment in other platforms.
Splunk
To send your OpenCTI data to Splunk follow the below steps
In Splunk
- Create a user that has API access
- Create a KV Store in Settings > Lookups > Lookup definitions > Add New
- Select destination app
- Name = opencti
- Type = KVStore
- Collection Name = opencti
- Supported fields = _key, created_at, defanged, extensions, extensionsspec_version, granular_markings, id, indicator, labels, message,name, object_marking_refs, origin, referer, spec_version, type, updated_at, user_id, value
- Create a collection so the KV Store can be referenced
- Go to $SPLUNK_HOME/etc/apps/appname/default/collections.conf and add [opencti] in that file
In OpenCTI
- Go to Data > Data Sharing > Add Stream > Filter on Fields you want to send to Splunk (URL, Domain, IPv4, IPv6, etc.)
- Copy the Stream ID
- Make sure Splunk connector has access
| Deploy the connector with the below config and everything you setup from previous steps. After this you should be able to pull the data in an | inputlookup command. |
1
2
3
4
5
6
7
8
9
10
11
12
13
14
15
16
17
18
19
20
21
22
23
connector-splunk:
    image: opencti/connector-splunk:${OPENCTI_VERSION}
    environment:
      - OPENCTI_URL=http://opencti:8080
      - OPENCTI_TOKEN=${SPLUNK_OPENCTI_TOKEN} # Splunk OpenCTI User Token
      - CONNECTOR_ID=${SPLUNK_CONNECTOR_ID} # Unique UUIDv4
      - CONNECTOR_TYPE=STREAM
      - CONNECTOR_LIVE_STREAM_ID=changeme # ID of the live stream created in the OpenCTI UI
      - CONNECTOR_LIVE_STREAM_LISTEN_DELETE=true
      - CONNECTOR_LIVE_STREAM_NO_DEPENDENCIES=true
      - "CONNECTOR_NAME=OpenCTI Splunk Connector"
      - CONNECTOR_SCOPE=splunk
      - CONNECTOR_CONFIDENCE_LEVEL=1 # From 0 (Unknown) to 100 (Fully trusted)
      - CONNECTOR_LOG_LEVEL=info
      - SPLUNK_URL=https://changeme:8089
      - SPLUNK_TOKEN=${SPLUNK_API_KEY}
      - SPLUNK_OWNER=${SPLUNK_OWNER} # Owner of the KV Store
      - SPLUNK_SSL_VERIFY=true # Disable if using self signed cert for Splunk
      - SPLUNK_APP=${SPLUNK_APP} # App where the KV Store is located
      - SPLUNK_KV_STORE_NAME=${SPLUNK_KV_STORE_NAME} # Name of created KV Store
    restart: always
    depends_on:
      - opencti
Exploring Data
Once you have data within your OpenCTI instance, you can begin exploring it. If data is lacking, you always have the option to manually add it yourself. Here’s a brief overview of each primary category.
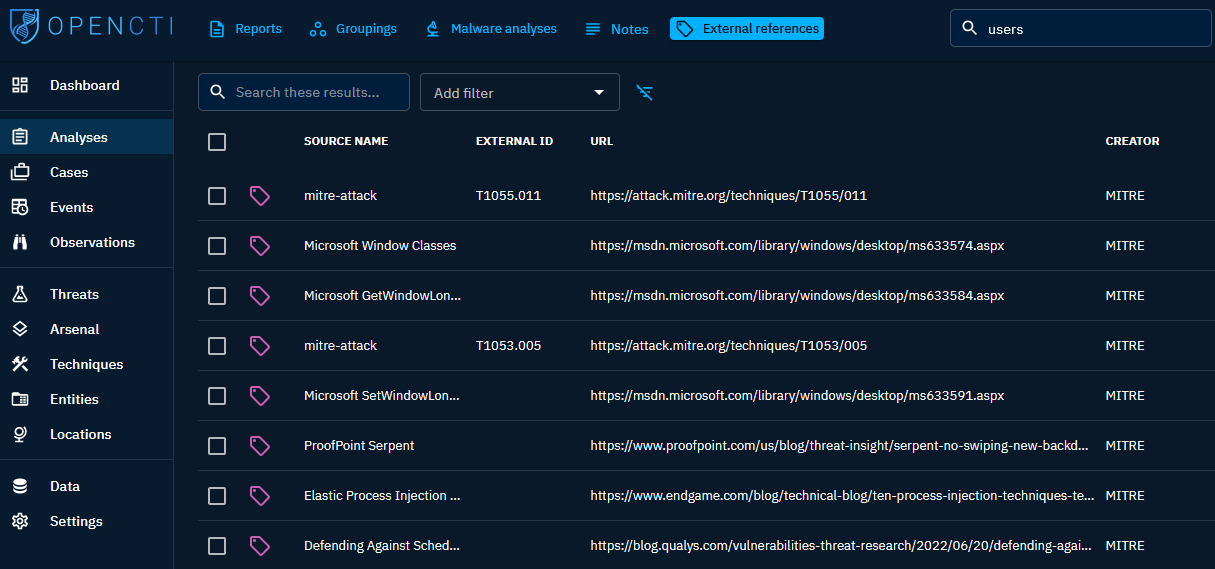
Analyses
This category encompasses Reports, Groups, Malware Analyses, Notes, and External References. These are used as a reference point for cases you create and linking to IOCs.
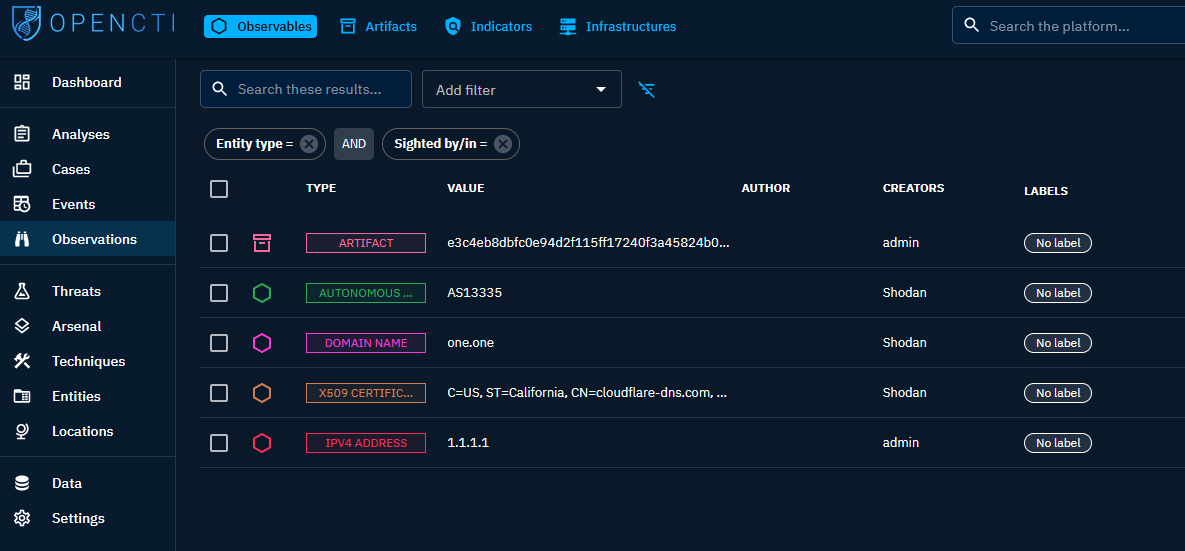
Observations
Under Observations, you’ll find several crucial categories: Observables, Artifacts, Indicators, and Infrastructures. Observables refer to all entities in the platform, while indicators serve as specific IOCs (Indicators of Compromise) for heightened awareness. Artifacts handle files, allowing OpenCTI to extract hashes and metadata upon upload.
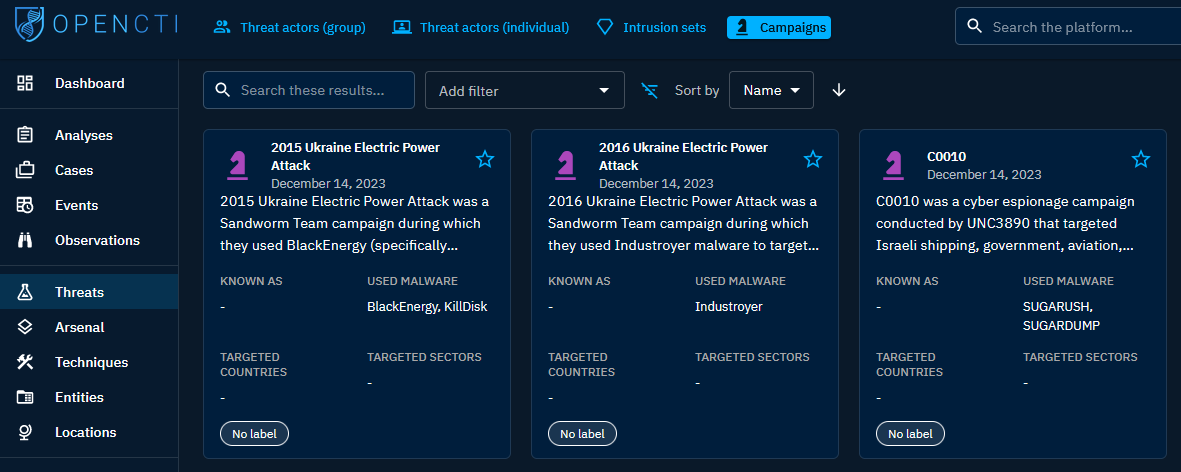
Threats
Threats cover a broad range, including threat actors—both groups and individuals. This section aids in building profiles or conducting in-depth research on specific actors. Additionally, there are intrusion sets and campaigns that provide a summary and timeline of incidents.
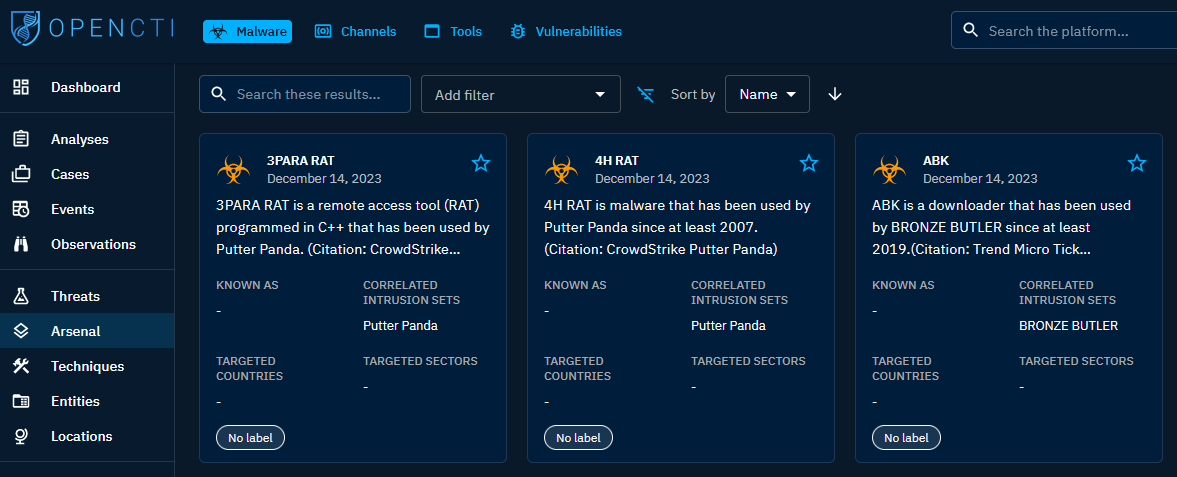
Arsenal
Arsenal contains information on malware, channes, tools, and vulnerablitlies.
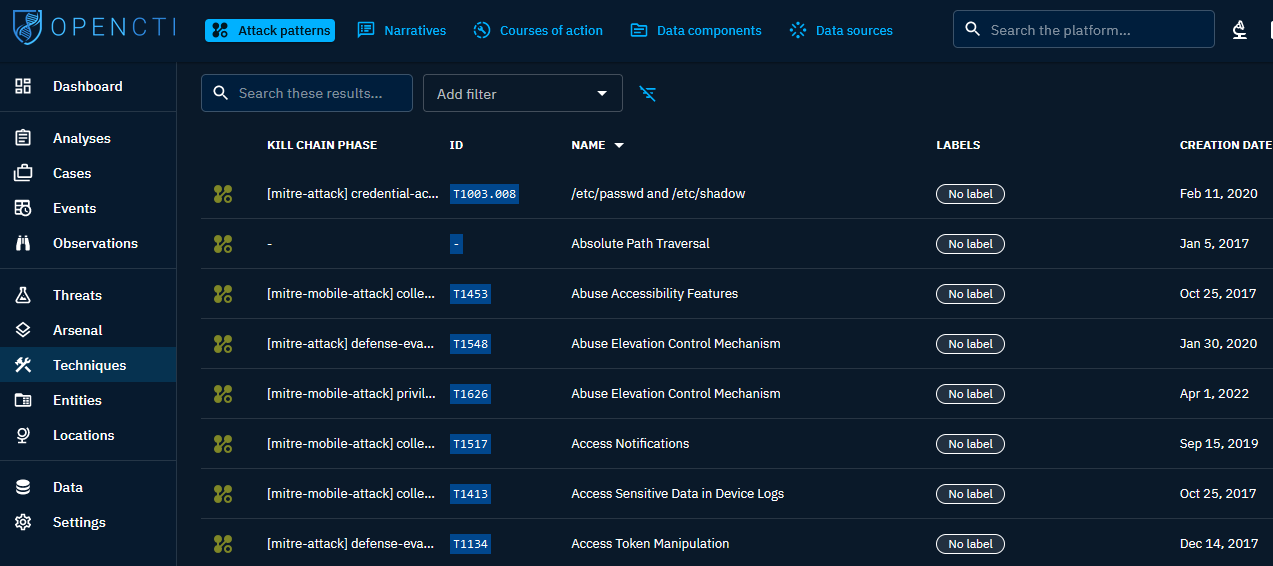
Techniques
When you need to reference ways a threat actor moved throughout an incident or data sources they came from Techniques will contain this type of data for you.
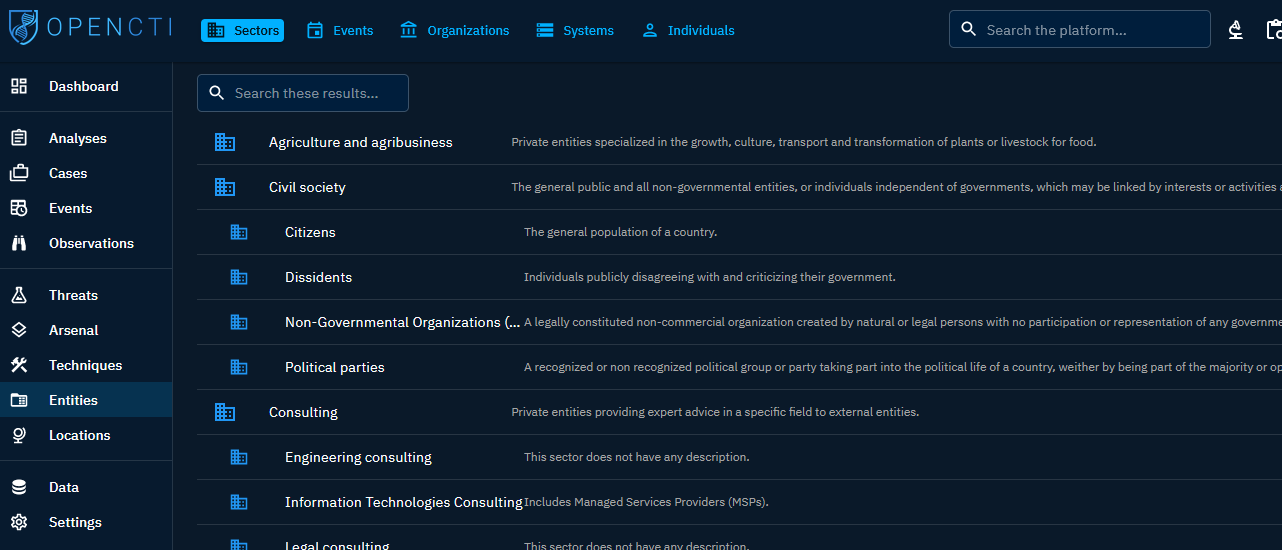
Entities
Referrencing organzations can be useful when tracking
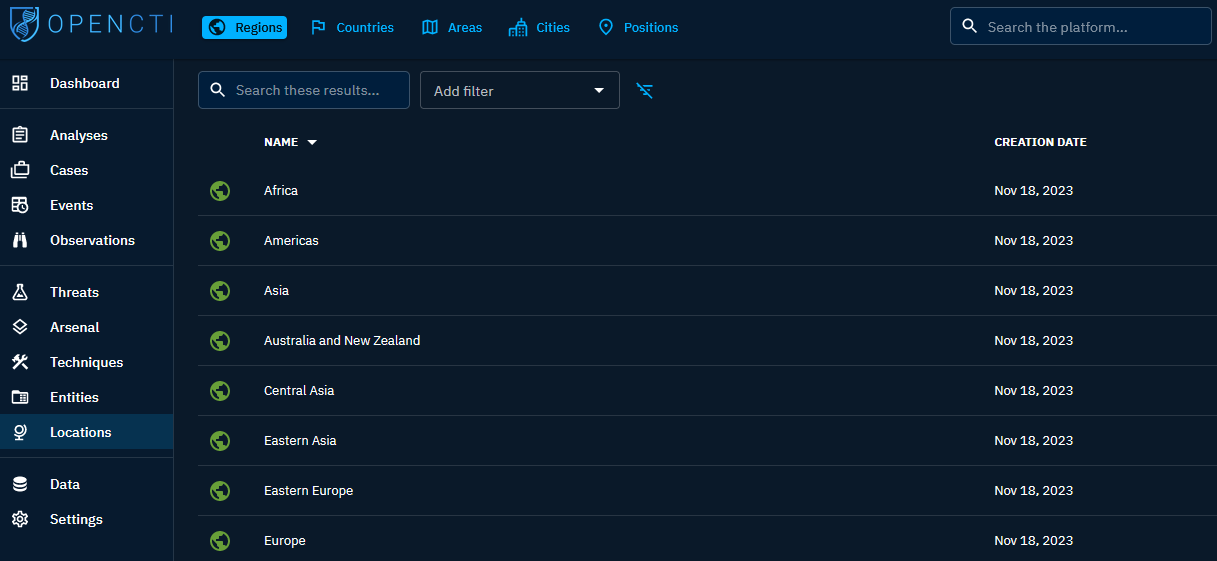
Locations
Regions, countries, areas, cities, positions
Incident Management
Utilizing the wealth of data at your disposal, one of the primary use cases is tracking an active incident within your organization. Events and Cases are instrumental in this regard. Below is an example showcasing the process. While the dates and times may not follow an accurate flow, they illustrate the capabilities of the OpenCTI platform.
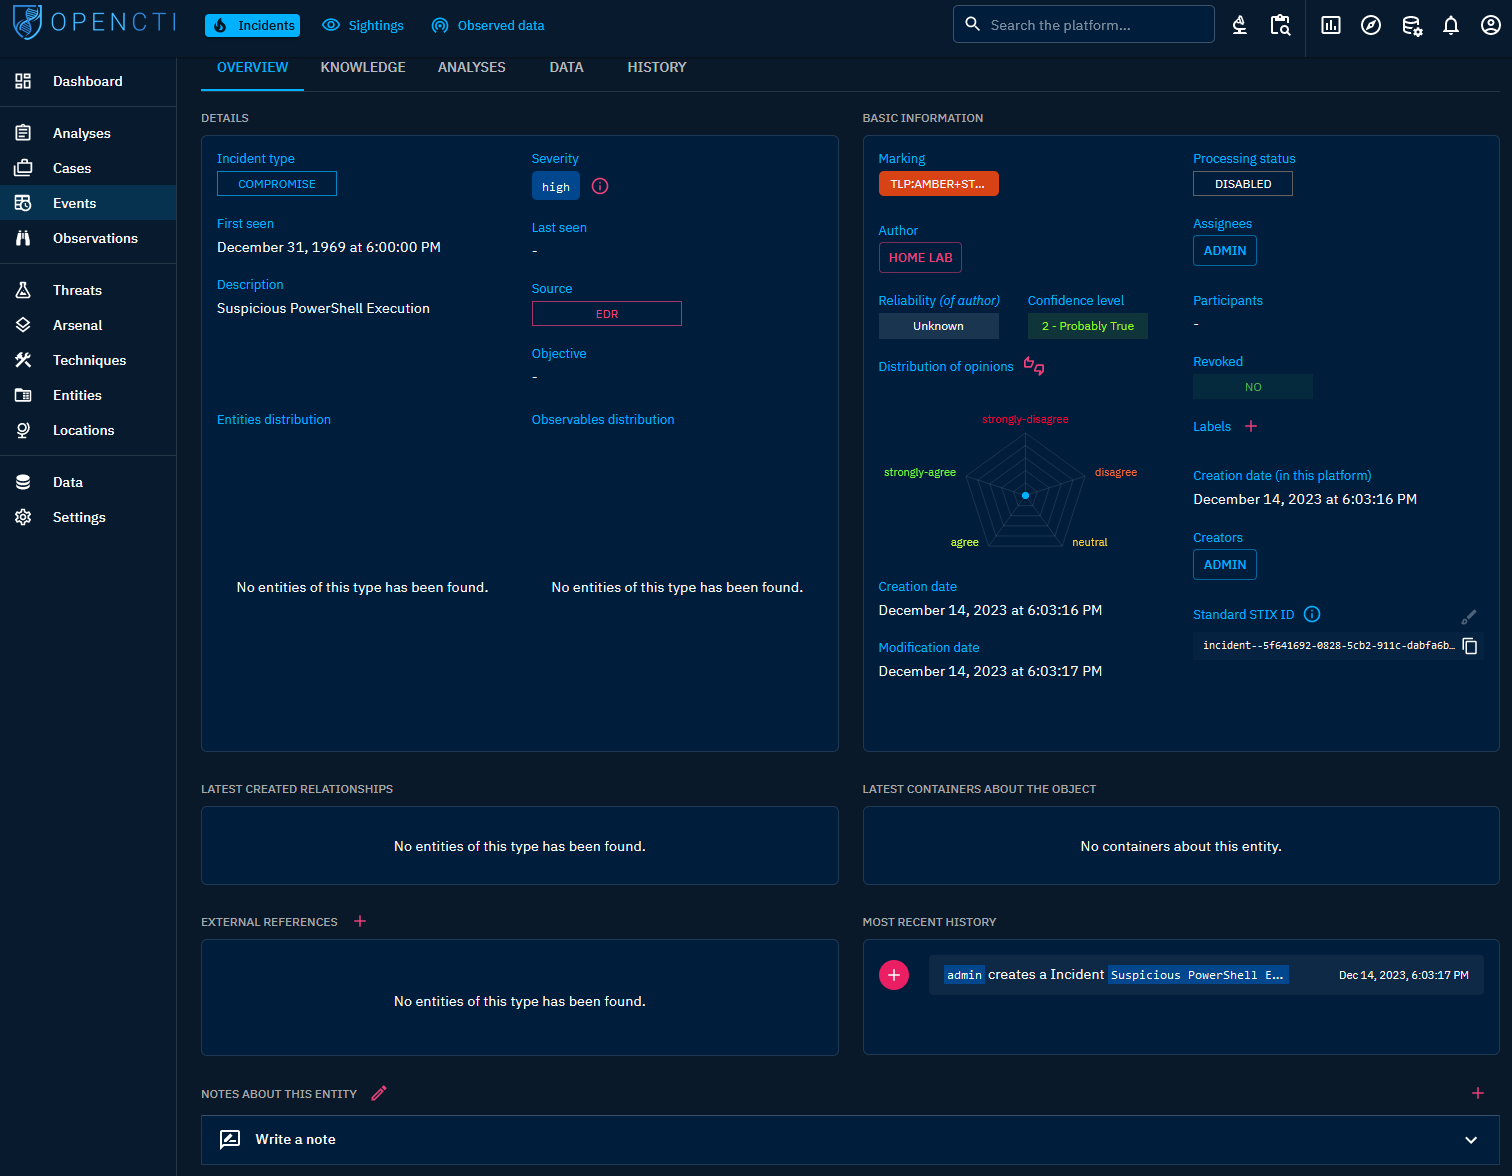
Initiate by creating an Incident under Events. This could be as basic as the initial alert that triggered an investigation. For instance, let’s assume our EDR flagged suspicious PowerShell activity.
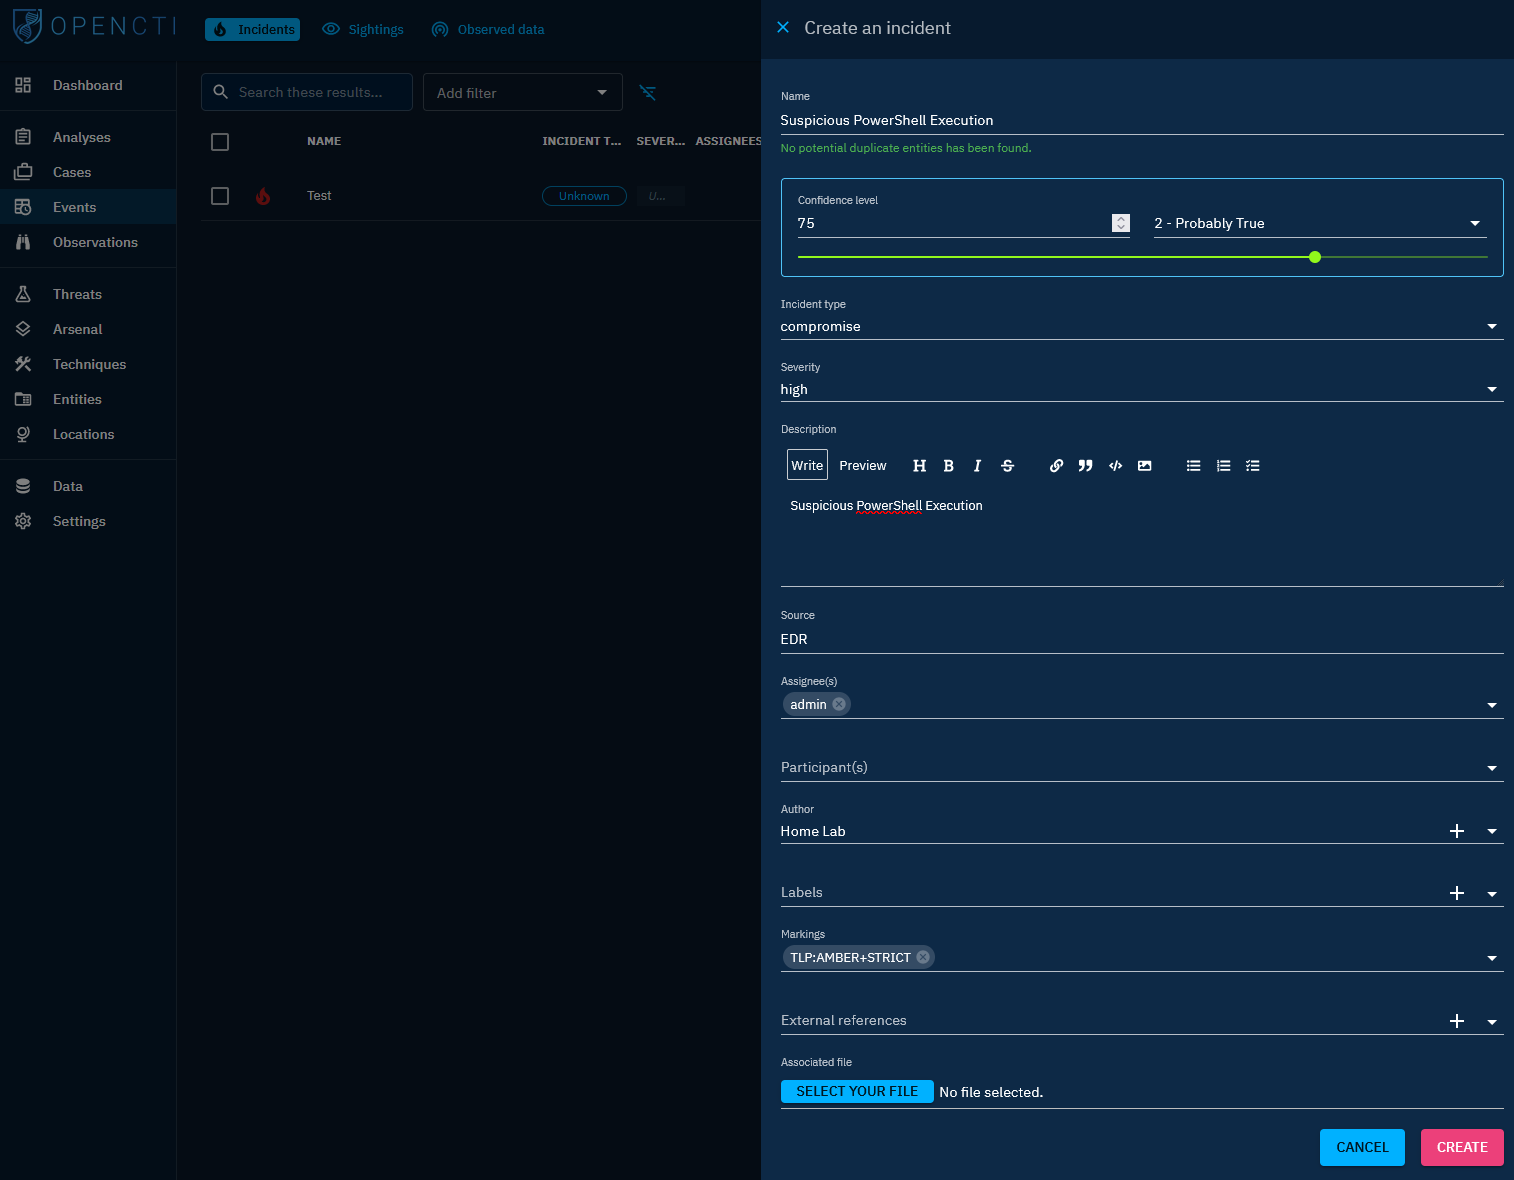
Upon selecting the incident, you’ll encounter the event summary. This section allows for the addition of observables, references, or other pertinent data to enrich the event. Analysts can be assigned to the incident for collaborative work, and notes can be added for seamless collaboration and knowledge sharing.
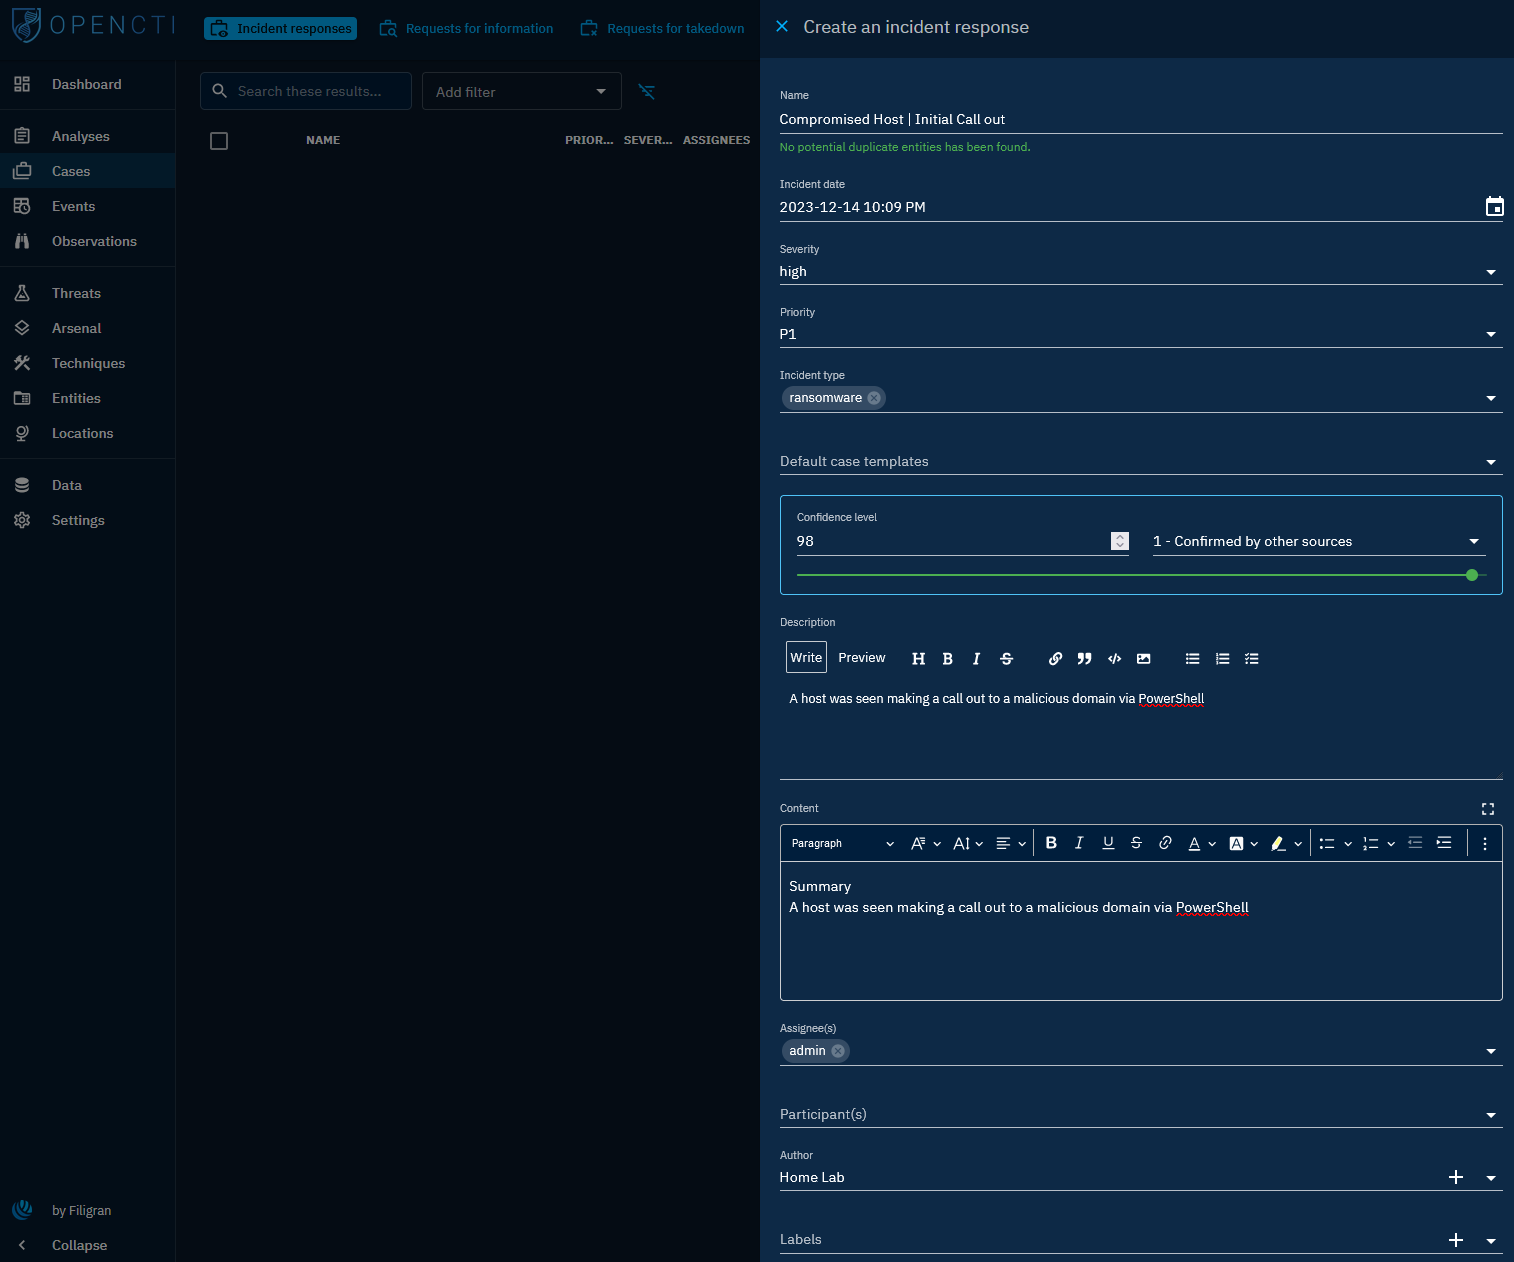
Since confirming this as a true positive, the next step involves creating an Incident Response Case. This allows for the correlation of data to enhance tracking. Navigate to the Cases tab and click the plus icon to create a new incident response case. Complete the form to align with the high-level overview of the incident under investigation.
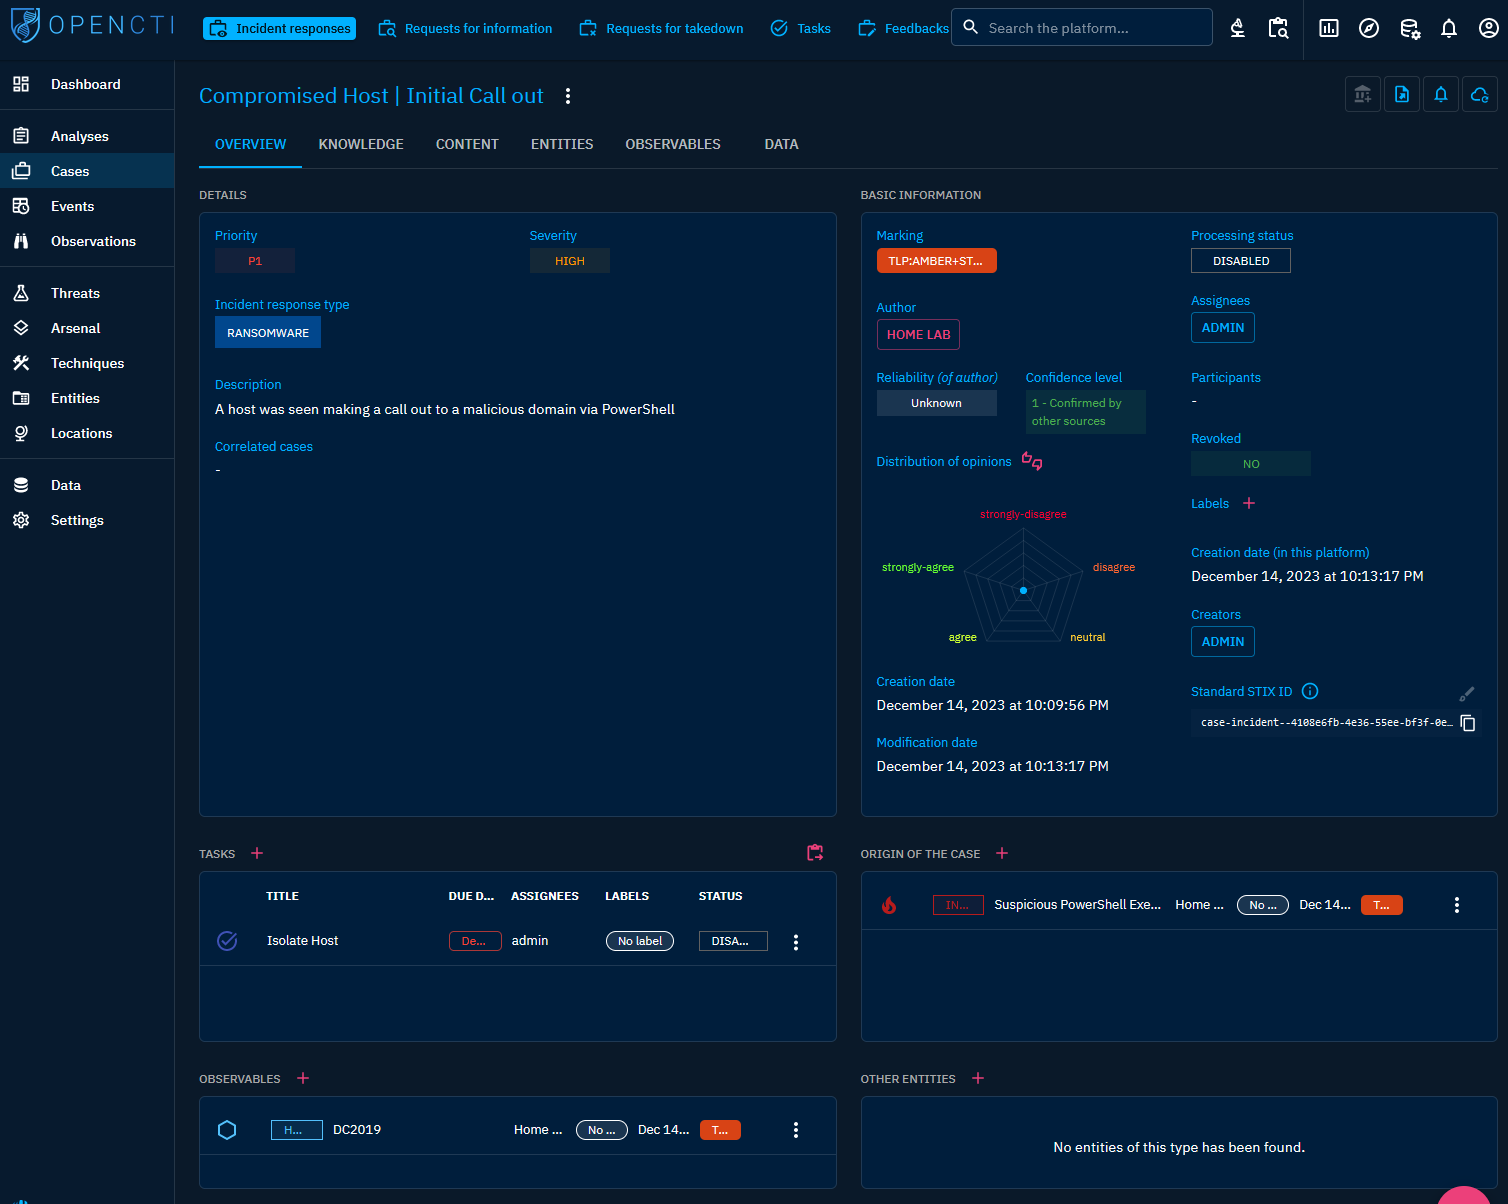
With the case created, commence by adding the previous incident as the origin of this case. Following this, generate and allocate tasks to analysts for execution. Additionally, include other entities and observables within the case for utilization throughout the investigation.
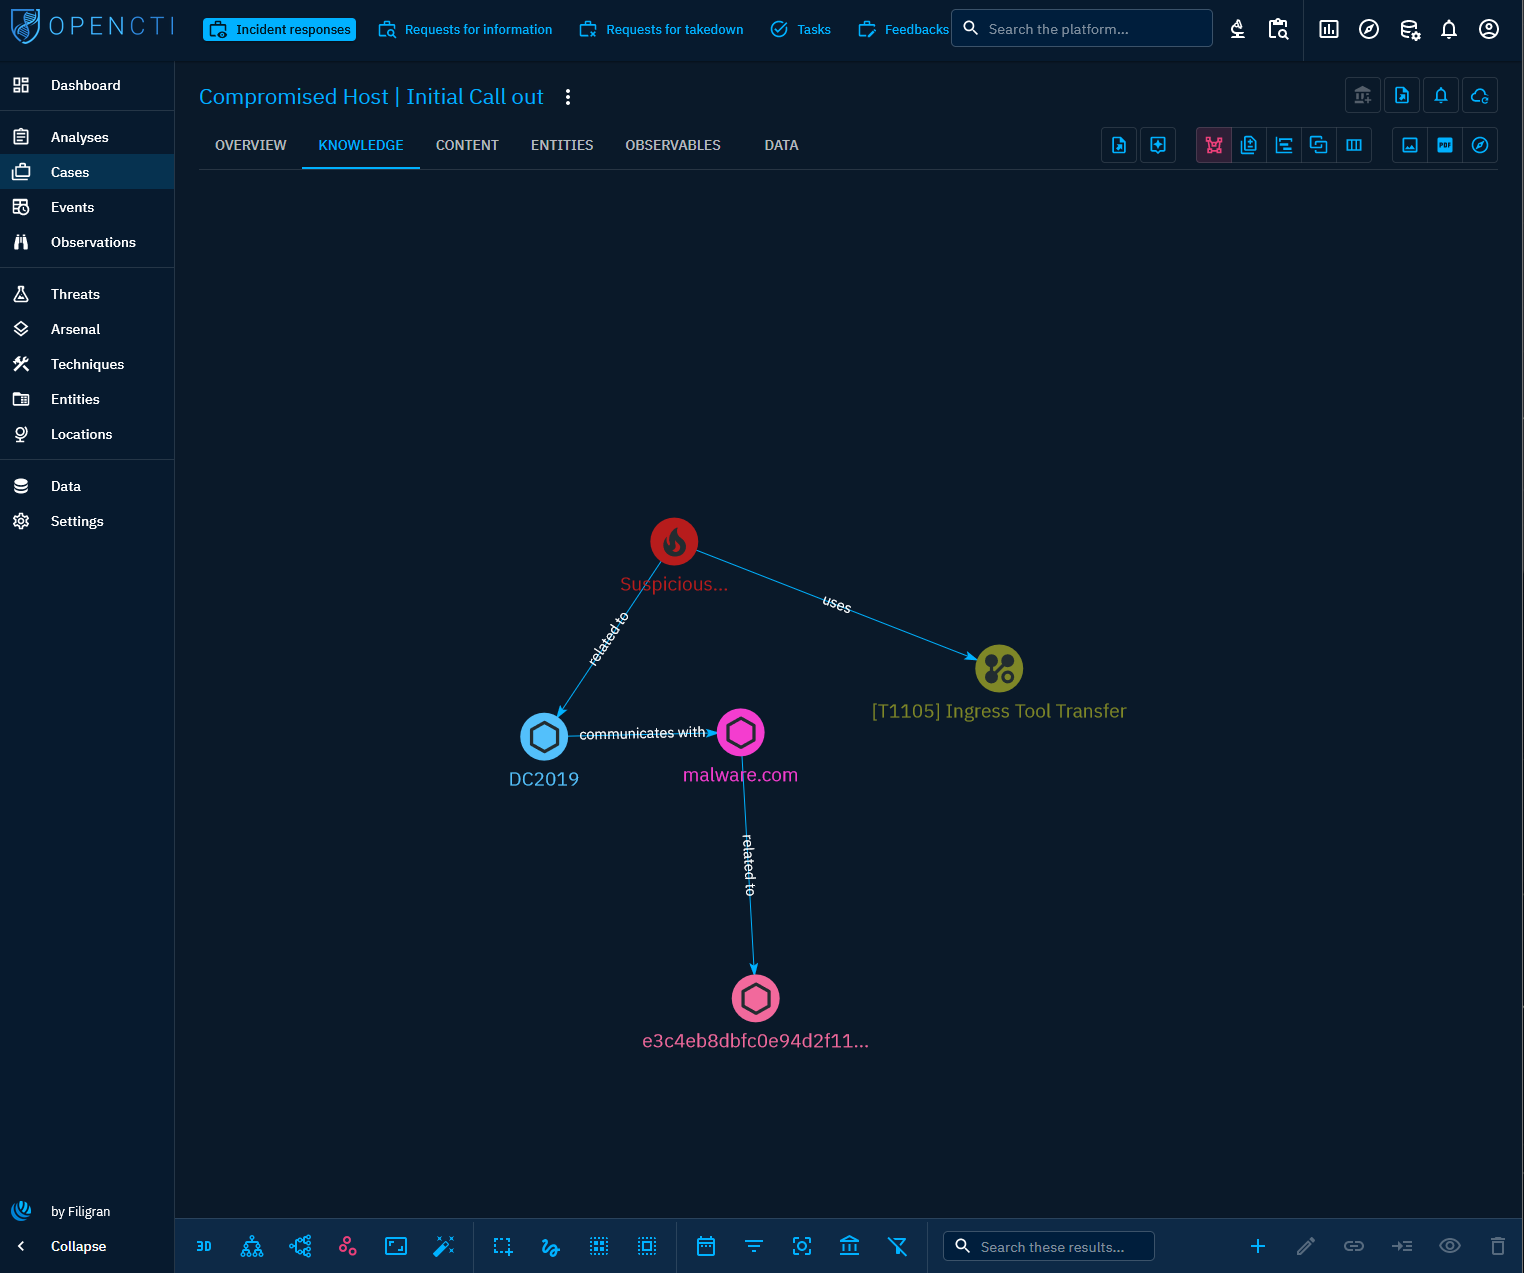
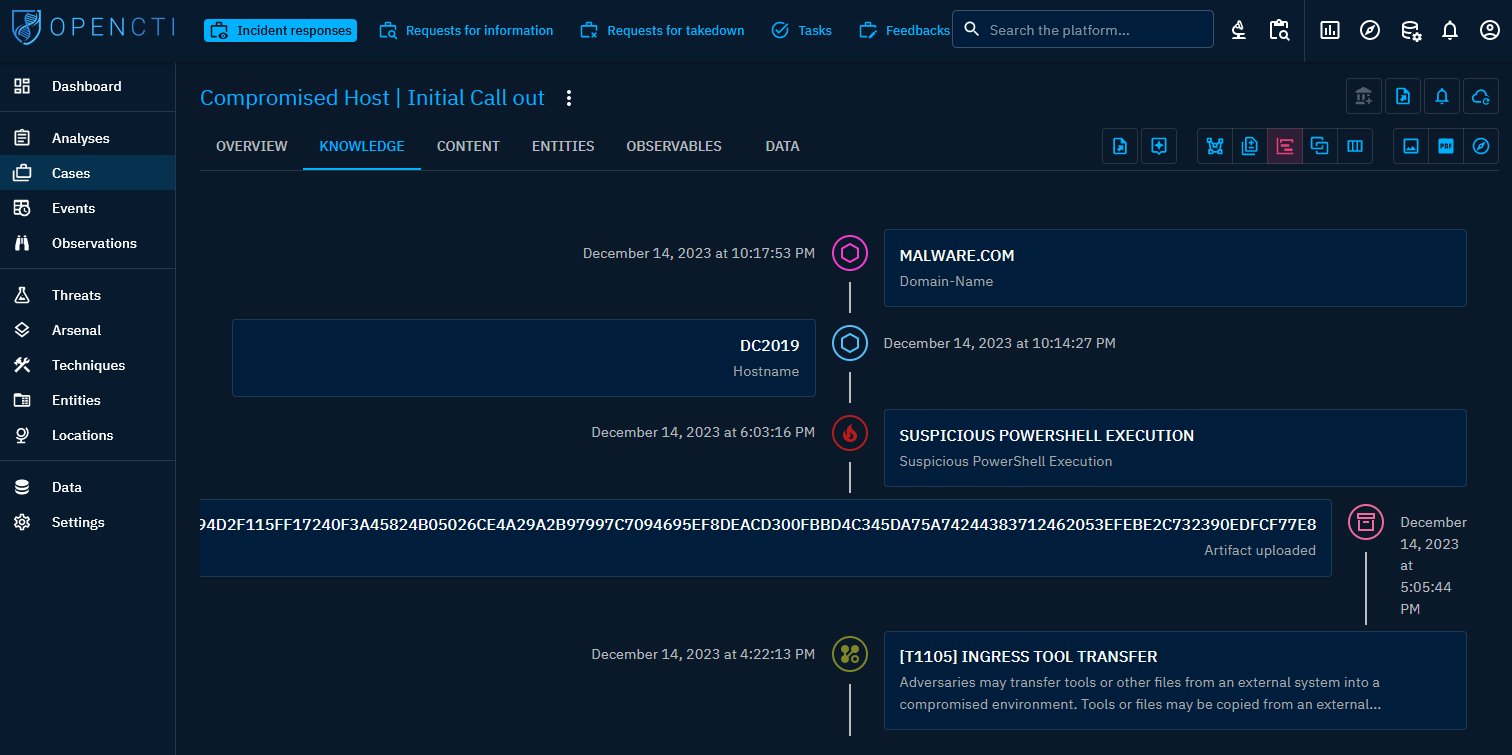
OpenCTI’s strength in tracking cases lies in its capability to visualize relationships. In our case, we’ve observed our initial incident involving the use of the MITRE technique T1105 Ingress Tool Transfer to download the malicious tool. This incident is linked to the host named DC2019, which exhibited communication with malware[.]com. Furthermore, the domain hosted a file that we’ve also uploaded to OpenCTI. The Visual tab serves as a valuable tool to monitor ongoing activities within the incident, making it crucial to continuously update as the investigation progresses.
Another effective method for monitoring case progression is through the timeline feature. Within the Knowledge tab, you can switch to the timeline view, allowing for a chronological display of activities. Accurate insertion of entities and observables with corresponding timestamps ensures an organized and coherent depiction of the sequence of events.
Additional features within incident response cases offer significant value, yet the best experience comes from uploading your own case data and exploring its mapping. Given the variability in how each organization handles cases, this hands-on approach allows you to witness firsthand how data mapping unfolds according to your specific case management practices.
API
Lastly, OpenCTI has a Python based API that can be used to pull data out of your platform. The API can be used very in depth. Below is a sample script to pull all IPv4 observalbles in the platform in descending order.
1
2
3
4
5
6
7
from pycti import OpenCTIApiClient

opencti_api_limit = 5000

ip_observables = opencti_api_client.stix_cyber_observable.list(first=opencti_api_limit, search="IPv4-Addr", orderBy="created_at", orderMode="desc")

print(ip_observables)