Teleport - Jump Host with Internal certificates
Are you seeking a better way to manage your SSH hosts? Have you ever wanted to audit executed commands on a machine and associate them with a specific user? Today, we’ll guide you through installing Teleport, a solution that fulfills these needs and more. Teleport serves as an exceptional tool for remote server management, offering secured shell connections, securing unencrypted applications through authentication, replaying remote session activities, and much more! For the latest commands, refer to the official documentation here.
Server Installation
To begin, it’s essential to set up a dedicated host for Teleport, which serves as our designated “jump” host for the environment. This host should be the exclusive gateway for connections to servers. Execute the following commands on your designated host to seamlessly install Teleport onto your server.
1
2
3
4
5
6
7
8
9
sudo curl https://apt.releases.teleport.dev/gpg  -o /usr/share/keyrings/teleport-archive-keyring.asc

source /etc/os-release

echo "deb [signed-by=/usr/share/keyrings/teleport-archive-keyring.asc] https://apt.releases.teleport.dev/${ID?} ${VERSION_CODENAME?} stable/v10" | sudo tee /etc/apt/sources.list.d/teleport.list > /dev/null

sudo apt-get update

sudo apt-get install teleport
Internal Certificate Creation
For internal usage of Teleport, configuring it involves the creation and installation of internal certificates. This process necessitates establishing an internal Certificate Authority (CA) and generating a certificate specifically for Teleport. Numerous methods exist for creating these certificates. In this guide, I’ll demonstrate using my PFSense box for their creation. This approach enables centralized certificate management, allowing me to conveniently back them up alongside my PFSense configuration.
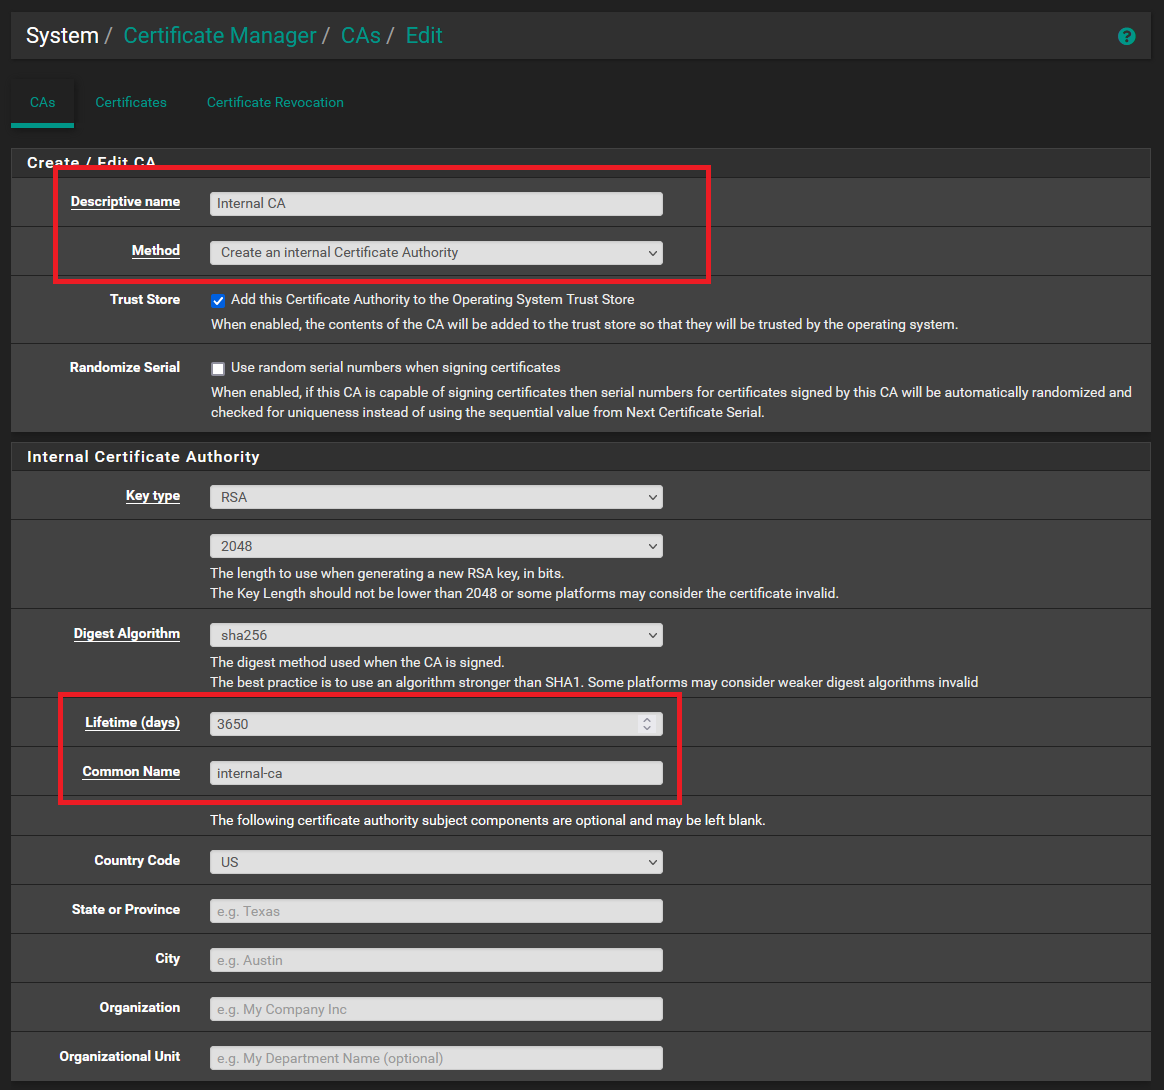
Navigate to System -> Cert. Manager in PFSense and proceed to create a new Certificate Authority. Refer to the provided image for guidance on completing the necessary fields. Once filled out, click “Save.” You can then retrieve the .crt file by selecting “Export CA.”
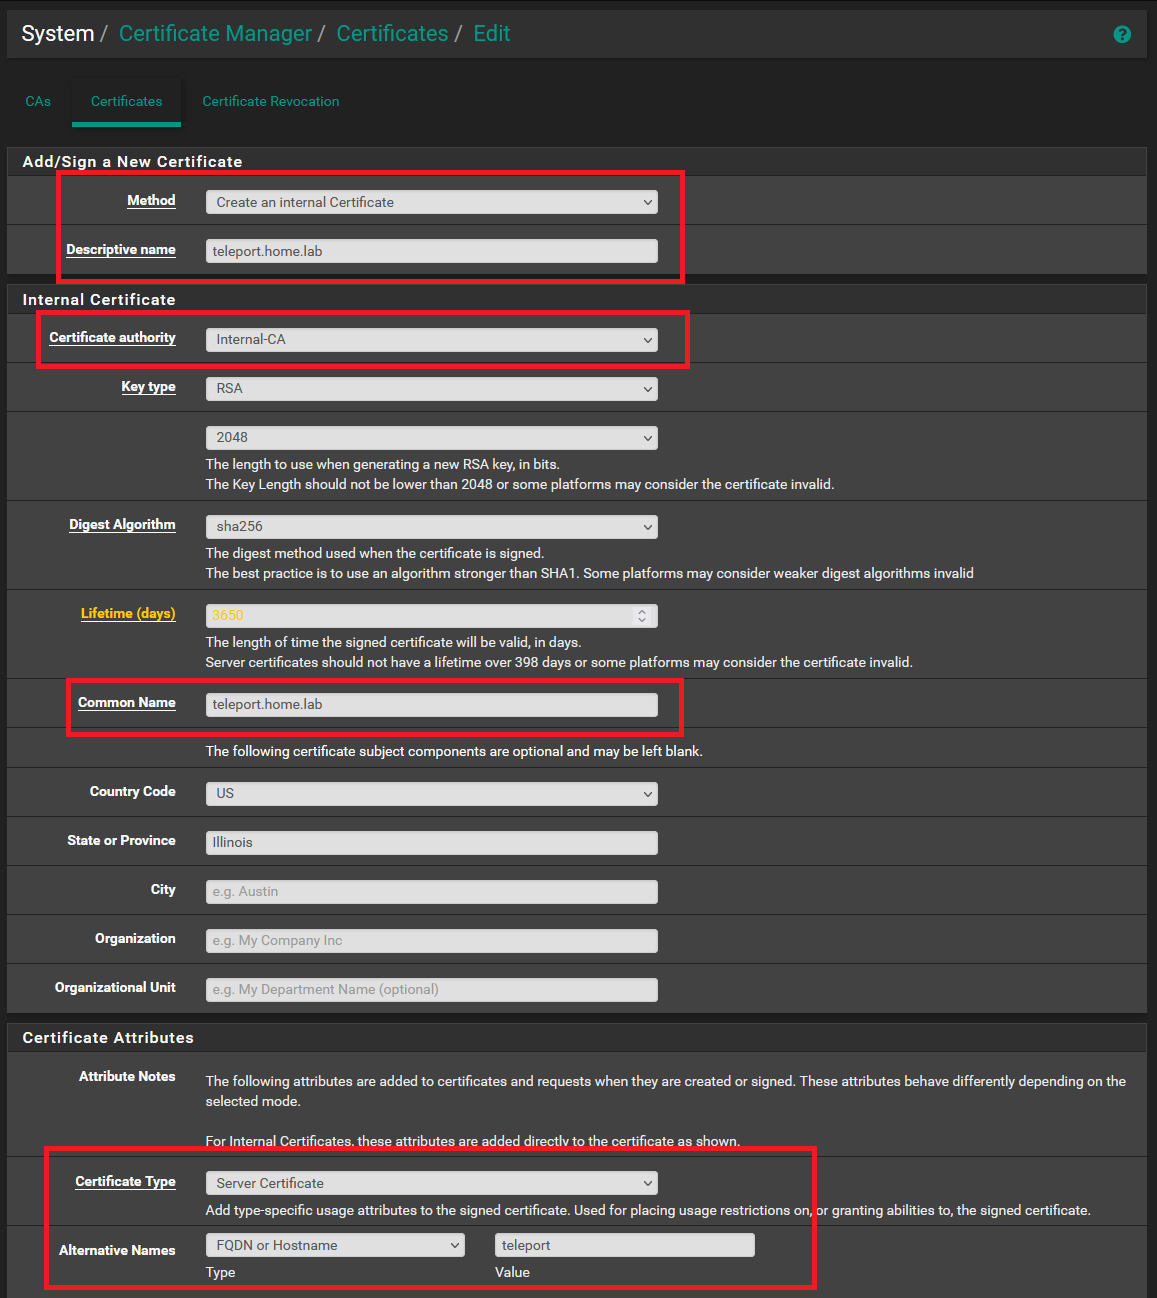
Proceed to the Certificates tab and generate a new certificate tailored specifically for Teleport. Keep the Method as “Create an Internal Certificate Authority.” Use a Descriptive Name that helps identify this certificate for Teleport. Select your previously created certificate authority. Set the Common Name as your DNS entry for Teleport—such as teleport.home.lab in my case. Ensure the Certificate Type is set to Server Certificate, and include the host’s name, in this case, “teleport,” in the Alternative Names field.
Reference the below image for values you should update.
Upon saving, remember to export both the certificate and key for your newly generated certificate.
Full Chain Creation
To create a full chain, merge both your certificate’s .crt file contents and your CA certificate contents into a single file named fullchain.pem.
You can achieve this by either manually copying and pasting the contents of your certificate and certificate authority into a new fullchain.pem file, or you can use the following commands, replacing the file names with the ones you downloaded in the previous steps.
1
2
cat teleport.home.lab.crt >> fullchain.pem
cat Internal-CA.crt >> fullchain.pem
Configure Teleport
On your Teleport host, create the fullchain.pem file by copying the contents from the previously generated fullchain.pem file. Additionally, create a privkey.pem file containing your certificate’s private key contents.
Place the fullchain.pem file in the directory /var/lib/teleport/fullchain.pem, and save the certificate’s private key content to /var/lib/teleport/privkey.pem.
1
2
sudo nano /var/lib/teleport/fullchain.pem
sudo nano /var/lib/teleport/privkey.pem
With all the required files in place, execute the following command to configure Teleport. Ensure to substitute “your-cluster-name” and “public-addr” with the full DNS name of your Teleport host. For instance, in my case, it would be teleport.home.lab.
1
2
3
4
5
sudo teleport configure -o file \
    --cluster-name=teleport.home.lab \
    --public-addr=teleport.home.lab:443 \
    --cert-file=/var/lib/teleport/fullchain.pem \
    --key-file=/var/lib/teleport/privkey.pem
You can officially launch Teleport by executing the following command.
1
sudo systemctl start teleport
The reason for the failure might be an invalid certificate error resulting from the use of self-signed certificates. To rectify this, install your internal Certificate Authority’s certificate on the Teleport host. Paste the contents of the certificate authority’s certificate into the specified file path below and update your host’s CA certificates.
1
2
sudo nano /usr/local/share/ca-certificates/internal-cert.crt
sudo update-ca-certificates
Now, you can initiate Teleport successfully using the following command.
1
sudo systemctl start teleport
User Creation
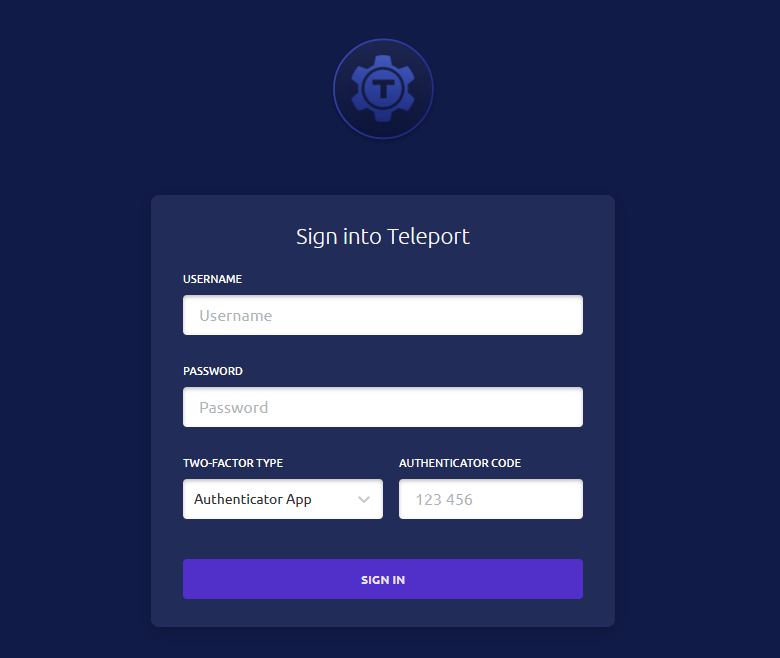
You should now be able to access Teleport through your web browser by navigating to https://teleport.home.lab or the DNS name you previously configured for Teleport.
Should you encounter a browser warning regarding an untrusted certificate, you can resolve this by installing your Certificate Authority’s certificate into your browser’s trusted certificates.
Before logging in, it’s essential to create an account using the Teleport command line tool. Return to your Teleport environment and execute the following command. Replace “teleport-admin” with your preferred account name, and specify the local users you want to grant access to the Teleport user.
1
sudo tctl users add teleport-admin --roles=editor,access --logins=sshuser
After executing the command, a link will appear in your terminal. Follow this link to set the password and TOTP (Time-based One-Time Password) method for your newly created user. Once the password is set, you’ll be logged into the primary interface of Teleport.
Connecting a Server
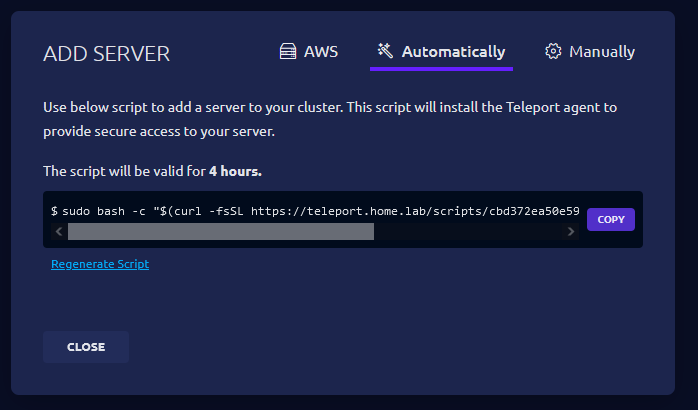
In order to connect your hosts to Teleport for a secured connect login with your user and on the Servers tab in the upper right hand corner you can click add server and click the automatically tab to generate a script to setup your server.
Before copying and executing this command, I recommend installing the certificate authority certificate on your new host, similar to how you did it on the main Teleport server.
1
2
sudo nano /usr/local/share/ca-certificates/internal-cert.crt
sudo update-ca-certificates
With Teleport connected to your new host, you now possess complete access to the host. You’ll be able to log in as your specified user(s) and effortlessly upload and download files to the box. If you encounter any issues, ensure that the hosts share the same time and that your client(s) can communicate with your Teleport server over TCP ports 443 and 3022. Happy Teleporting!